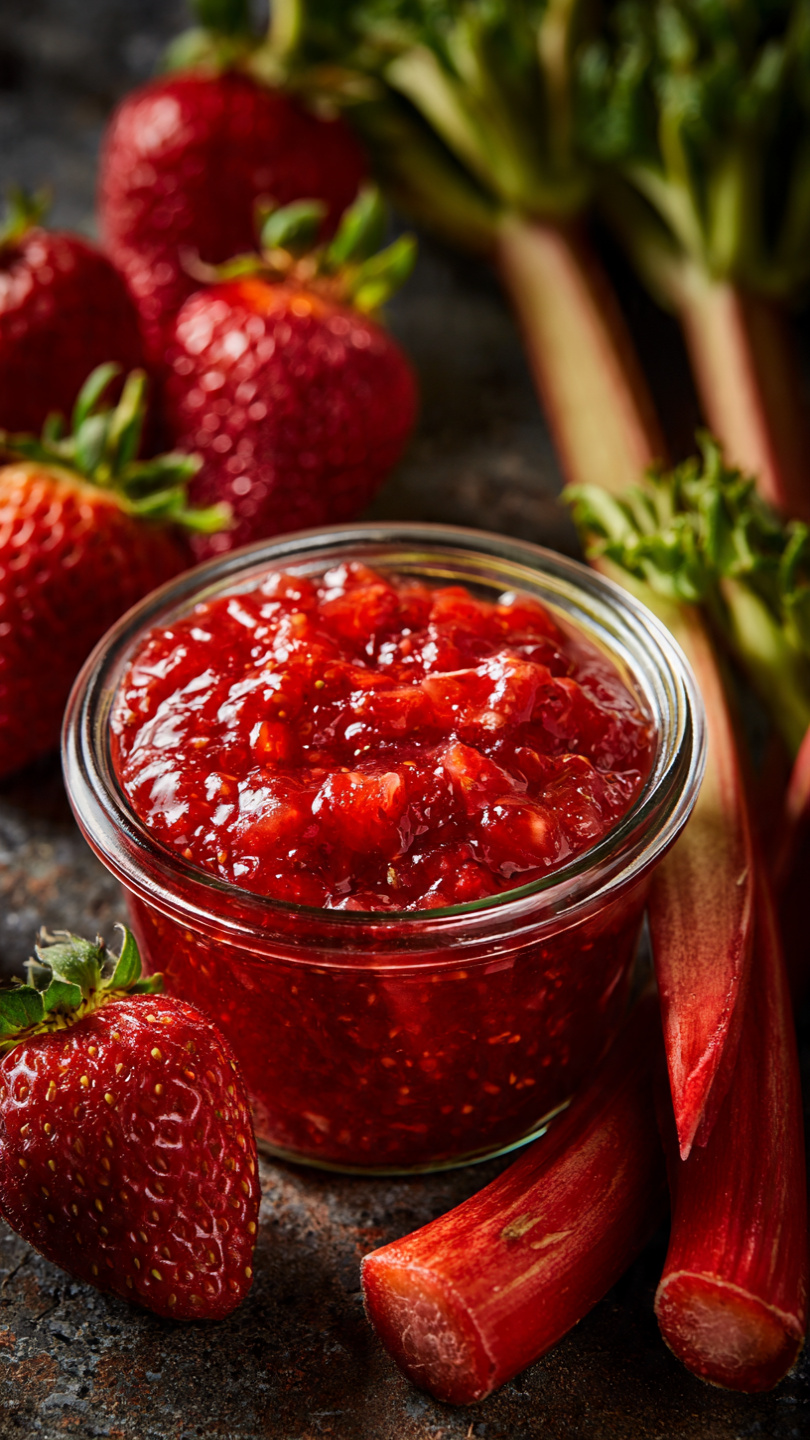
Homemade Strawberry Rhubarb Jam
This homemade strawberry rhubarb jam is the perfect balance of sweet and tart, made with fresh fruit and no artificial anything. Spread it on toast, swirl it into yogurt, or gift it to someone you love.

The Jam That Tastes Like the First Week of Summer
There is something almost magical about the moment strawberries and rhubarb meet in a hot pot. The sharp, grassy tartness of the rhubarb softens into the berries, the sugar pulls out all that gorgeous juice, and within half an hour your kitchen smells like a farmstand at peak season. This homemade strawberry rhubarb jam is one of those recipes that sounds ambitious but is genuinely forgiving, and the payoff is extraordinary.
Whether you are a seasoned canner or this is your very first jam, this recipe walks you through every step, including the old-school frozen plate trick for testing the set, so you never have to guess.
Why Strawberry and Rhubarb Are a Perfect Pair
Rhubarb on its own is bracingly sour, almost unpleasant. Strawberries on their own can make a jam that tastes flat and one-dimensional. Together? They are genuinely greater than the sum of their parts.
The rhubarb brings a bright, almost citrusy acidity that keeps the jam from tasting cloying, while the strawberries contribute natural sweetness, body, and that beautiful ruby-red color. A squeeze of fresh lemon juice and a little zest sharpen everything up and help the jam set without relying heavily on added pectin.
Chef's Tip: Always use the freshest, ripest strawberries you can find. Overripe berries that are too soft to eat fresh are actually ideal here since their flavor is more concentrated and they break down beautifully during cooking.
What You Need Before You Start
Good jam does not require fancy equipment, but a few key tools genuinely make the process easier and more consistent. A heavy-bottomed pot is essential since it distributes heat evenly and prevents the sugary mixture from scorching on the bottom. Wide-mouth jars with new lids are worth the small investment if you plan to store your jam long-term.
Having the right gear on hand before you start means you can focus on the jam instead of scrambling mid-cook.
Tools & Ingredients We Recommend


The Frozen Plate Trick: Never Guess the Set Again
This is the technique that separates confident jam makers from anxious ones. Before you start cooking, put two small ceramic plates in the freezer. When you think the jam might be ready, drop a small spoonful onto one of the cold plates, wait 30 seconds, then push it gently with your fingertip.
- It wrinkles and holds its shape: Your jam is set. Pull it off the heat immediately.
- It spreads and stays liquid: Keep cooking in 5-minute intervals and test again.
This takes all the guesswork out of the process, and it works every single time.
Tips for Getting It Just Right
Do not walk away from the pot. As the jam thickens, it needs more frequent stirring to prevent sticking, especially in the final 10 minutes of cooking.
Skim the foam. A pink, foamy layer will rise to the surface as the jam boils. It will not hurt anything, but skimming it off gives you a cleaner, clearer final product.
Go low and slow after the initial boil. A hard rolling boil the entire time can cause the jam to cook unevenly. Bring it to a boil, then settle into a steady, active simmer.
Ready to make it? Here is the full step-by-step recipe:
Homemade Strawberry Rhubarb Jam
This homemade strawberry rhubarb jam is the perfect balance of sweet and tart, made with fresh fruit and no artificial anything. Spread it on toast, swirl it into yogurt, or gift it to someone you love.
Ingredients
- 4 cups fresh strawberries, hulled and roughly chopped
- 2 cups fresh rhubarb, trimmed and sliced into 0.5-inch pieces
- 3 cups granulated sugar
- 2 tbsp fresh lemon juice, about 1 large lemon
- 1 tsp lemon zest, optional but recommended
- 1 tbsp powdered pectin, optional, for a firmer set
Instruction
Place two small ceramic plates in the freezer. You will use these later to test the jam set.
Combine the chopped strawberries, sliced rhubarb, and lemon juice in a large heavy-bottomed pot or Dutch oven. Stir to combine.
If using pectin, whisk it into the sugar before adding it to the fruit. Add all the sugar to the pot and stir well to coat the fruit.
Let the mixture sit at room temperature for 15 minutes, stirring occasionally, until the fruit begins to release its juices.
Bring the mixture to a boil over medium-high heat, stirring frequently to prevent scorching. Once boiling, reduce heat to medium and continue to cook at a steady, bubbling simmer.
Cook for 20 to 30 minutes, stirring regularly, until the jam thickens and the rhubarb has completely broken down. Skim off any pink foam that rises to the surface.
To test the set, drop a small spoonful of jam onto one of the frozen plates. Let it sit for 30 seconds, then push it with your finger. If it wrinkles and holds its shape, the jam is ready. If it is still runny, cook for another 5 minutes and test again.
Remove the pot from heat and stir in the lemon zest if using.
Ladle the hot jam into sterilized jars, leaving 0.25 inch of headspace. Wipe the rims clean, seal with lids, and process in a boiling water bath for 10 minutes for shelf-stable storage, or simply refrigerate immediately.
Equipment
- Large heavy-bottomed pot or Dutch oven
- Wooden spoon or heat-resistant silicone spatula
- Ladle
- Sterilized glass jars with lids
- Canning funnel (optional but helpful)
- Small ceramic plates (for set testing)
- Fine mesh skimmer or spoon
Notes
Serving and Storing Your Jam
This jam is endlessly versatile. The obvious use is slathered on thick-cut toast with salted butter, but do not stop there. Swirl it into plain yogurt, spoon it over vanilla ice cream, use it as a filling for thumbprint cookies, or spread it between layers of a simple butter cake.
For storage, properly water-bath processed jars will keep in a cool, dark pantry for up to a year. Refrigerator-only jars are good for about 3 weeks. You can also freeze the jam in small containers for up to 6 months, which is a great option if you made a big batch at the height of strawberry season and want to enjoy it well into winter.