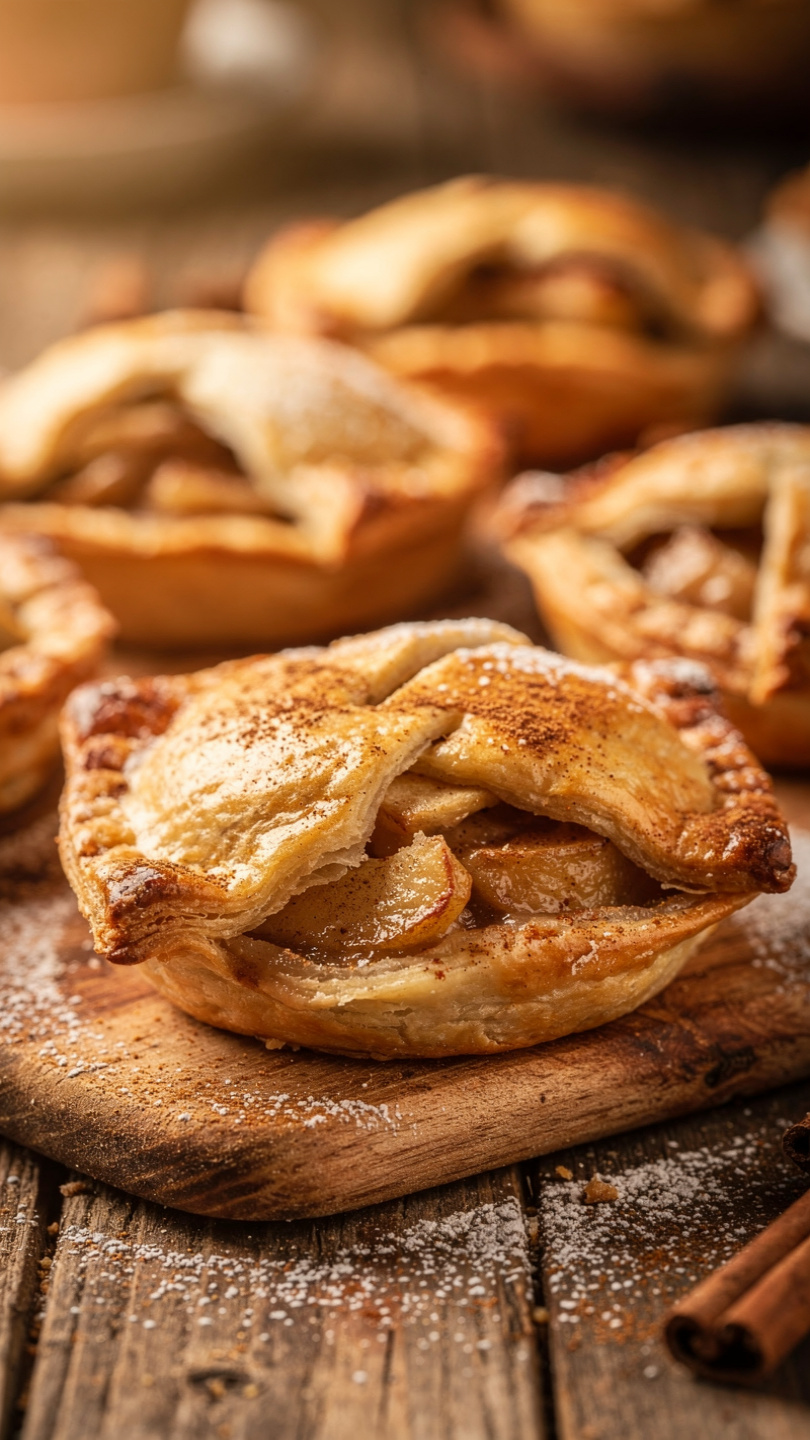
Apple Hand Pies (Flaky, Buttery, and Perfect for Fall)
These golden Apple Hand Pies are filled with warm cinnamon-spiced apples tucked inside a flaky, buttery pastry crust. Perfect for parties, lunchboxes, or cozy fall afternoons.

The Handheld Apple Dessert You Will Make Every Fall
There is something genuinely magical about holding a warm, golden pastry in your hands and biting through a shatteringly flaky crust into a bubbling, cinnamon-spiced apple filling. These Apple Hand Pies deliver exactly that, and they have become one of the most-requested treats I bring to every autumn gathering, school event, and lazy Sunday afternoon.
Unlike a full apple pie that demands slicing, plating, and a fork, hand pies are wonderfully portable and personal. Every guest gets their own golden little parcel. Kids love them, adults devour them, and they disappear faster than you would ever expect.
Why This Recipe Works So Well
The secret to a truly great hand pie comes down to two things: a properly cold, flaky pastry and a filling that is thick enough not to leak.
For the dough, we use plenty of cold butter worked into the flour until it looks like rough, pea-sized crumbs. Those small butter pockets are what create steam during baking, which is exactly what makes the crust puff and shatter beautifully. Do not overwork it, and do not skip the chill time.
For the filling, we briefly cook the apples on the stovetop with brown sugar, cinnamon, nutmeg, and a tablespoon of cornstarch. That short cook-down does two important things: it softens the apples so they do not stay raw inside the pie, and it thickens the juices so the filling stays put instead of running out the sides.
Chef's Tip: Always let your apple filling cool completely before assembling the pies. Warm filling will begin to soften the dough before it even hits the oven, which leads to soggy bottoms and broken seals.
Choosing the Right Apples
Not all apples behave the same way in baked goods, and it matters here. Granny Smith apples are the go-to choice because their tartness balances the brown sugar beautifully and they hold their shape during cooking rather than turning to mush.
That said, feel free to mix varieties for a more complex flavor. A blend of Granny Smith and Honeycrisp is particularly good, giving you a little tartness alongside a deeper, honeyed sweetness.
Avoid very soft apples like McIntosh or Red Delicious. They tend to break down too much during the stovetop cook and produce a watery, textureless filling.
Using the right kitchen tools genuinely makes a difference when working with pastry dough. A good pastry cutter keeps the butter cold and properly sized, and a heavy rolling pin gives you even, consistent thickness every time.
Tools & Ingredients We Recommend


Tips for a Perfectly Flaky Crust
Pastry can feel intimidating, but it really comes down to one rule: keep everything cold.
- Use ice water, not just cold tap water
- Cut your butter into cubes and put them back in the freezer for 10 minutes before starting
- Work quickly with your hands, since body heat softens butter fast
- Do not skip the 30-minute refrigerator rest for the dough
- Roll the dough on a lightly floured surface and move it frequently to prevent sticking
If at any point the dough starts to feel greasy or the butter looks like it is melting into the flour, slide the whole bowl into the fridge for 15 minutes before continuing.
How to Get a Perfect Golden Finish
That bakery-quality shine comes from a simple egg wash, which is just one beaten egg brushed across the top of each pie before baking. It gives the crust a rich, deep golden color and a glossy finish.
For extra sparkle and a gentle crunch, finish with a sprinkle of coarse or turbinado sugar right before they go into the oven. It is a small detail that makes them look truly stunning.
Ready to bake your own batch? Here is everything you need:
Apple Hand Pies (Flaky, Buttery, and Perfect for Fall)
These golden Apple Hand Pies are filled with warm cinnamon-spiced apples tucked inside a flaky, buttery pastry crust. Perfect for parties, lunchboxes, or cozy fall afternoons.
Ingredients
- 2 1/2 cups all-purpose flour, plus more for dusting
- 1 tbsp granulated sugar, for the pastry dough
- 1/2 tsp salt
- 1 cups unsalted butter, cold, cut into small cubes
- 6 tbsp ice water, add one tablespoon at a time
- 3 Granny Smith apples, peeled, cored, and finely diced
- 3/8 cups brown sugar, packed
- 1 tsp ground cinnamon
- 1/4 tsp ground nutmeg
- 1 tbsp cornstarch, helps thicken the filling
- 1 tbsp lemon juice, freshly squeezed
- 1 large egg, beaten, for egg wash
- 2 tbsp coarse sugar, for sprinkling on top, optional
Instruction
Make the pastry dough: In a large bowl, whisk together the flour, 1 tablespoon of granulated sugar, and salt. Add the cold cubed butter and use a pastry cutter or your fingertips to work it into the flour until the mixture resembles coarse, pea-sized crumbs.
Drizzle in the ice water one tablespoon at a time, stirring gently with a fork after each addition, just until the dough comes together. Divide the dough in half, flatten each half into a disk, wrap in plastic wrap, and refrigerate for at least 30 minutes.
Make the apple filling: In a medium saucepan over medium heat, combine the diced apples, brown sugar, cinnamon, nutmeg, cornstarch, and lemon juice. Cook, stirring occasionally, for 5 to 7 minutes until the apples soften slightly and the filling thickens. Remove from heat and let cool completely.
Preheat your oven to 400 degrees F (205 degrees C). Line two baking sheets with parchment paper.
On a lightly floured surface, roll out one disk of dough to about 1/8-inch thickness. Use a 4 to 5-inch round cutter or a small bowl to cut out circles. Re-roll scraps as needed. Repeat with the second dough disk.
Place a heaping tablespoon of cooled apple filling in the center of half of the dough circles. Lightly brush the edges with egg wash, then top each with another dough circle. Press the edges together firmly and crimp with a fork to seal.
Transfer the hand pies to the prepared baking sheets. Brush the tops generously with egg wash and sprinkle with coarse sugar if using. Use a sharp knife to cut two small slits in the top of each pie to allow steam to escape.
Bake for 22 to 25 minutes, until the pies are deeply golden brown. Let cool on the baking sheets for at least 10 minutes before serving.
Equipment
- Large mixing bowl
- Pastry cutter or food processor
- Plastic wrap
- Medium saucepan
- Rolling pin
- 4 to 5-inch round cookie cutter or small bowl
- Two baking sheets
- Parchment paper
- Pastry brush
- Fork
Notes
Serving, Storing, and Variations
Apple Hand Pies are at their absolute best served warm, about 15 minutes out of the oven, when the crust is still crisp and the filling is just gooey enough. A small scoop of vanilla ice cream alongside each one is never a bad idea.
For storing, keep them loosely covered at room temperature for up to 2 days, or refrigerate for up to 4 days. Reheat in a 325 degrees F oven for 8 to 10 minutes rather than the microwave, which tends to make the crust go soft.
Want to switch things up? Try these easy variations:
- Caramel Apple: Drizzle a teaspoon of thick caramel sauce into each pie before sealing
- Apple Cheddar: Add a small square of sharp white cheddar inside each pie for a savory-sweet twist
- Spiced Pear: Swap the apples for ripe but firm Bosc pears and add a pinch of ground cardamom